
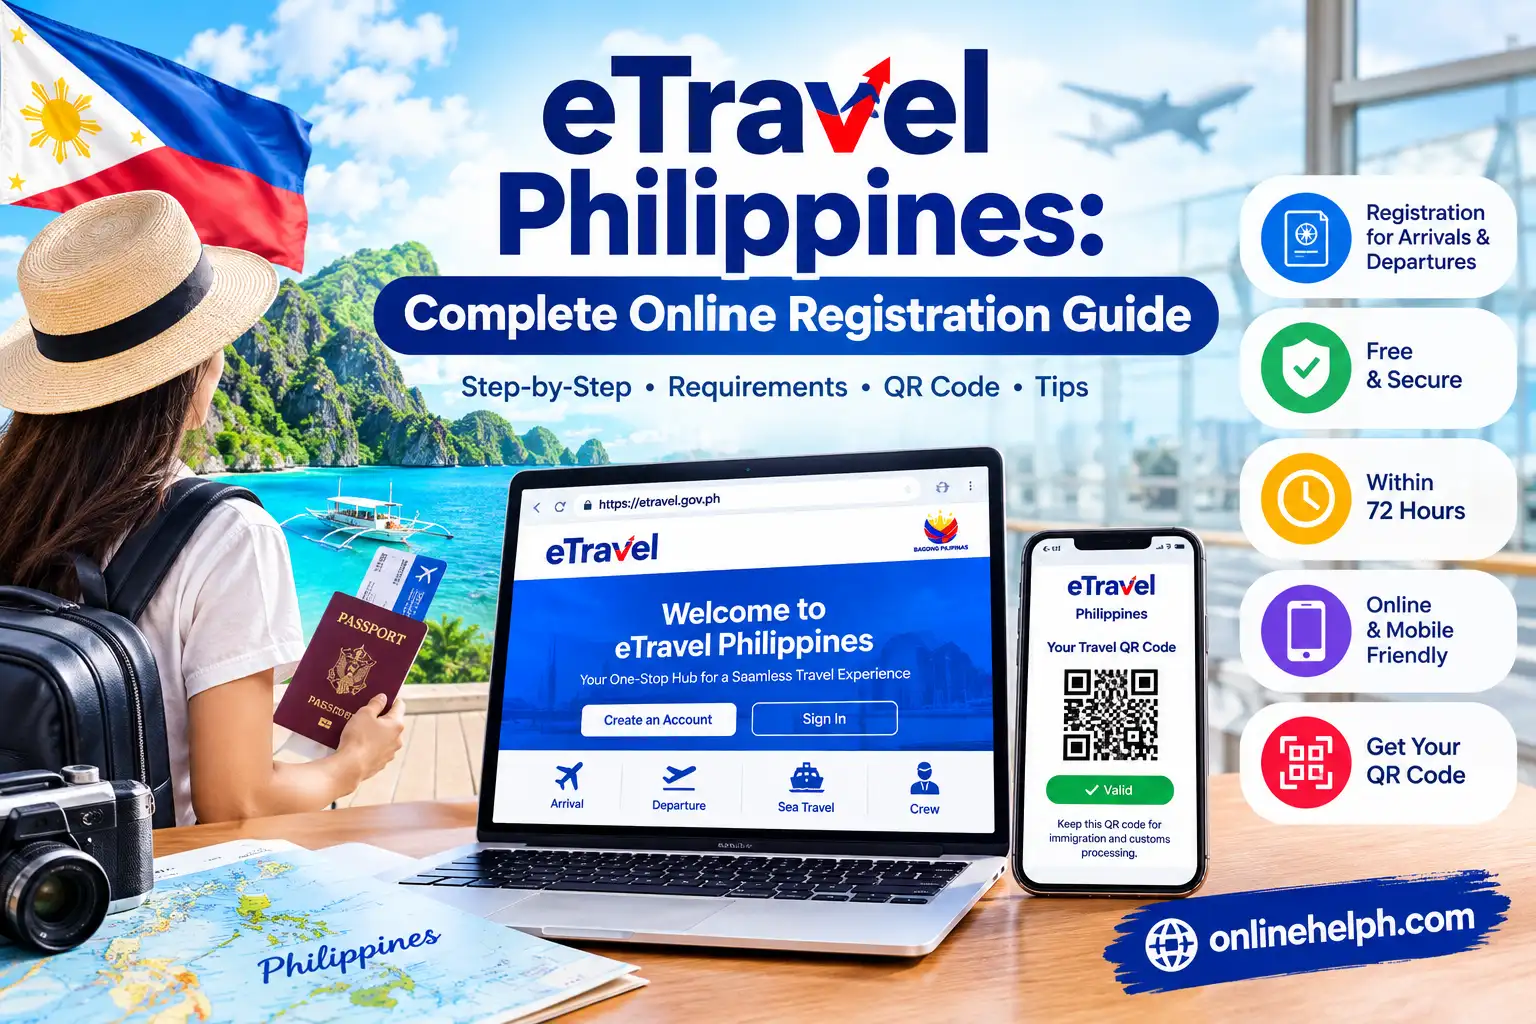
Travelling to or from the Philippines involves more than booking a flight and carrying your passport. International passengers may also need to complete the eTravel Philippines registration before travelling. The official system is designed to collect passenger, travel, health and customs information through one online platform.
The most important point is simple: eTravel Philippines is free. The Philippine government identifies https://etravel.gov.ph/ as the official eTravel website and warns travellers about fake websites that ask for payment.
This guide explains how eTravel Philippines works, who needs to register, what information you should prepare, how to complete the online registration, and what to do with your QR code afterwards. The information below follows the official eTravel guidance and the source material provided for this guide. Homepage for more
What Is eTravel Philippines?
eTravel Philippines is the Philippine government’s electronic travel declaration system. It provides a single digital platform used for passenger information and border-related processing involving agencies such as the Bureau of Immigration, Bureau of Customs, Bureau of Quarantine and Department of Tourism.
Instead of completing several separate paper-based processes, eligible travellers can submit their information online through the eTravel Philippines portal. The system is mobile-responsive, so you can access it through a smartphone, tablet, laptop or desktop computer.
Official eTravel Philippines Website
Always start with the government portal:
Official eTravel Philippines: etravel.gov.ph
The official website currently states that eTravel is FREE and provides access to Sign In and the eGovPH application.
Important: If a website claims that you must pay a registration fee or enter credit-card information simply to complete eTravel registration, do not proceed. Official eTravel registration does not require online payment.
Who Needs eTravel Philippines Registration?
The official FAQ states that the system covers arriving Filipino and foreign passengers, arriving Filipino and foreign crew members, and departing Filipino passengers, subject to stated exemptions for certain diplomatic and official travellers.
For ordinary travellers, the practical distinction is:
| Travel situation | eTravel registration |
|---|---|
| Filipino arriving in the Philippines | Required |
| Foreign passenger arriving in the Philippines | Required |
| Filipino departing from the Philippines | Required |
| Foreign tourist departing the Philippines | Generally not required under the passenger-registration rule |
| Travellers using an eligible cruise journey | Use the applicable eTravel registration process |
Because travel requirements can change, check the official portal before every international trip rather than relying on an old registration.
When Should You Register for eTravel Philippines?
Timing matters. You should not normally complete your registration weeks before your trip.
The official eTravel system says registration is available within 72 hours (three days) before arrival or departure in the Philippines. Travellers are also advised to have proof of eTravel registration available before boarding.
A simple example
If your flight is scheduled for Friday evening, check the permitted 72-hour period and complete the registration once you are inside that window.
Trying to register too early may result in a date-related error because the system restricts registration to the applicable travel window.
Best practice: Don’t leave eTravel Philippines until the last few minutes before heading to the airport. Complete it when the 72-hour window opens, review the information carefully and save your QR code.
What You Need Before Starting eTravel Philippines
Having your travel information ready makes the process much smoother. Before opening the portal, keep your passport and booking details nearby.
Prepare these details
| Information | Why you may need it |
|---|---|
| Passport | Name, passport number, nationality and date of birth |
| Flight or vessel information | Carrier, flight/voyage number and travel date |
| Philippine destination | Port of entry/exit and relevant travel details |
| Accommodation information | Hotel, resort or residential address where applicable |
| Email address | Account creation and verification |
| Mobile number | Personal profile/contact information |
| Personal information | Citizenship, gender, date/place of birth and related details |
| Customs information | Currency, baggage and goods declarations where applicable |
The exact fields shown can depend on your traveller category and the current version of the eTravel system.
Do You Need to Download an App?
No separate app is required to use the eTravel website. The official FAQ describes eTravel as a web-based, mobile-responsive platform that can be opened through an internet browser. The government also provides access through the eGovPH application.
How to Register on eTravel Philippines
Once your documents are ready and your travel date falls within the permitted registration window, you can begin.
Step 1: Open the Official eTravel Website
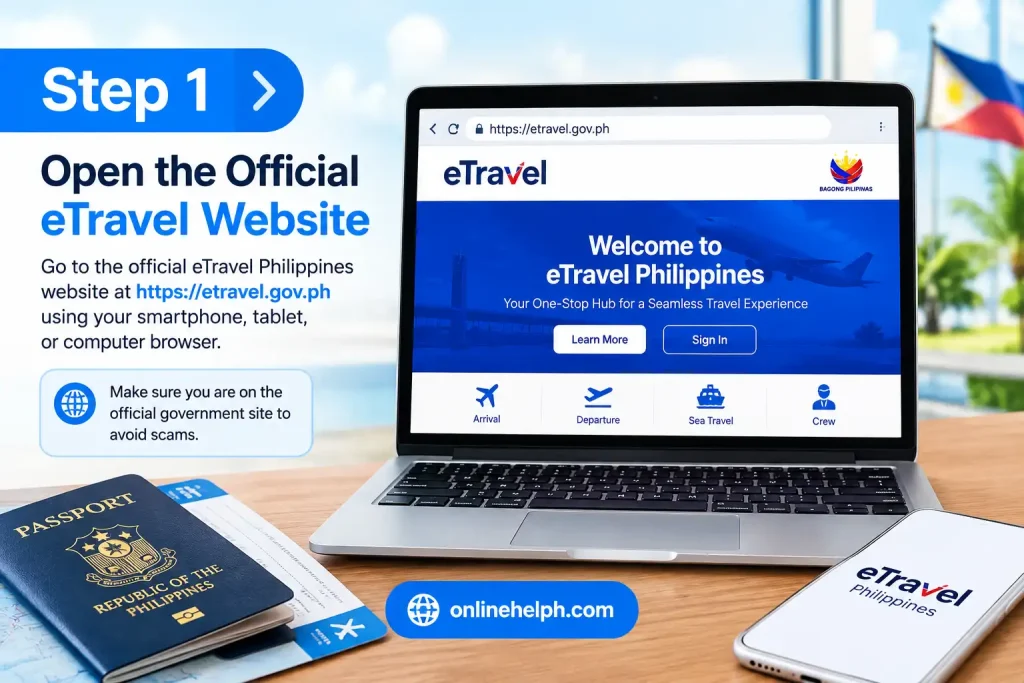
Open a reliable browser on your phone or computer and visit the official portal:
Open the official eTravel Philippines portal
Avoid searching for random registration websites and selecting an advertisement or third-party service. The Bureau of Immigration specifically advises travellers to use the government’s official eTravel website because fraudulent sites have charged travellers for a service that is free.
Look for the official Sign In option on the portal.
If you are using the system for the first time, follow the available account-creation instructions.
Step 2: Create and Verify Your Account
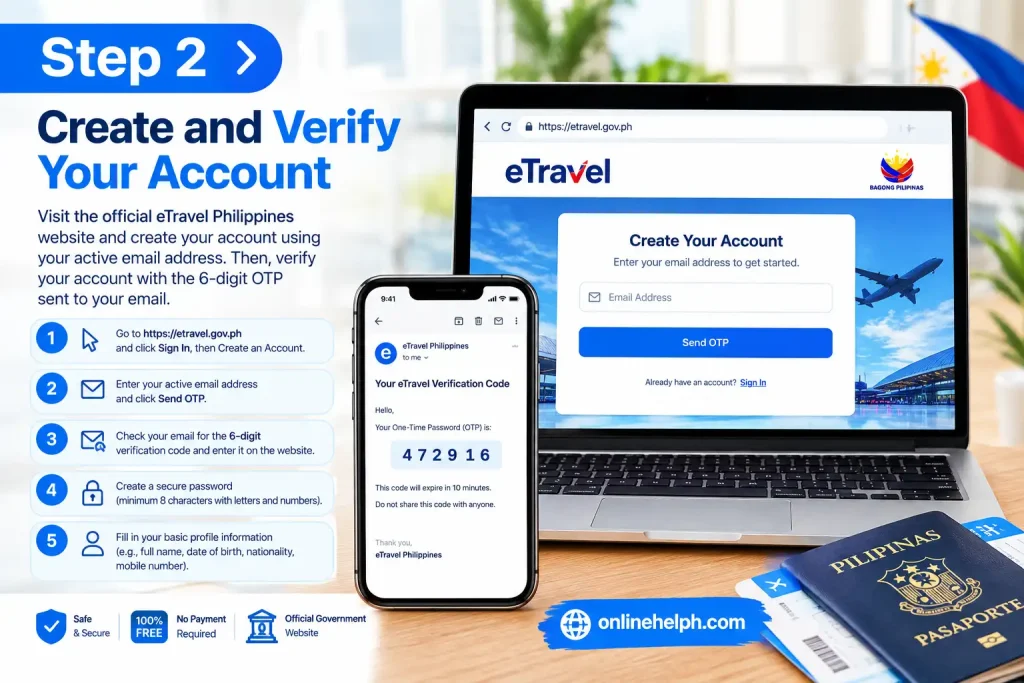
The registration process requires an active email address for account verification.
Generally, you will need to:
- Select the account-creation option.
- Enter your active email address.
- Request the verification OTP.
- Check your email for the verification code.
- Enter the code in the eTravel system.
- Create your account credentials.
- Complete your basic personal information.
The information you provide should match your official travel documents. Pay particular attention to your full name, date of birth, citizenship and passport information.
What If the OTP Does Not Arrive?
Don’t repeatedly request codes immediately.
First:
- Check your Spam or Junk folder.
- Confirm that the email address was entered correctly.
- Wait briefly before requesting another code.
- Make sure you have a stable internet connection.
- Try again if the system permits another OTP request.
An incorrectly entered email address can create unnecessary problems later, so check it carefully before proceeding.
Step 3: Start Your Travel Registration
After signing in, locate the option for creating or updating your travel registration.
You will need to identify the type of journey you are making.
Arrival
Choose the applicable Arrival option when you are entering the Philippines.
This applies to relevant incoming Filipino and foreign passengers covered by the eTravel requirements.
Departure
For departure registration, the official eTravel FAQ identifies departing Filipino passengers as required to register.
Foreign tourists leaving the Philippines should not automatically assume they need the same departure registration as Filipino passengers; check the current official instructions for your particular travel circumstances.
Step 4: Enter Your Travel Information
This is where your passport and booking confirmation become particularly useful.
Depending on your journey, you may be asked for information such as:
- Airline or shipping line
- Flight or voyage number
- Travel date
- Port of entry or exit
- Passenger classification
- Other itinerary information
For an air journey, make sure your airline and flight number correspond with the information on your actual booking.
Why Accuracy Matters
A small mistake in a passport number or travel date can create confusion during processing. Before moving to the next section, compare the information on screen against your passport and booking confirmation.
Don’t rely on memory when entering numbers.
Step 5: Complete the Relevant Declarations
The eTravel Philippines system integrates information used by different government border agencies.
The system has also incorporated electronic Customs Baggage Declaration and Currency Declaration functions. The Bureau of Customs explains that eTravel provides a single platform for relevant customs declarations and border-control information.
You may therefore encounter questions concerning:
- Baggage
- Currency
- Goods acquired overseas
- Items requiring permits
- Other customs declarations
- Health-related information
Answer each question truthfully based on what you are actually carrying and your current circumstances.
Currency Declaration
Current Bureau of Customs guidance states that foreign currency exceeding US$10,000 or its equivalent must be declared. For Philippine currency, amounts above ₱50,000 require prior written authorisation from the Bangko Sentral ng Pilipinas and must be properly declared.
This is one reason travellers should not treat the customs section as a formality. Read each question carefully.
Step 6: Review Everything Before Submission
Before selecting the final submission button, stop and check your entire registration.
Pay particular attention to:
Personal information
- Full name
- Date of birth
- Citizenship
- Passport details
Travel information
- Airline
- Flight number
- Travel date
- Port of entry or exit
Contact information
- Email address
- Mobile number
Declarations
- Health information
- Customs information
- Currency and baggage declarations, where applicable
If something is incorrect, fix it before submitting whenever the system allows.
The goal is not simply to finish the form quickly. The information should accurately represent your actual journey.
Step 7: Submit and Save Your eTravel QR Code
After the required information has been completed and reviewed, submit the registration.
A QR code is generated as proof of successful eTravel registration. The official system advises travellers to present their eTravel QR code for flight boarding.
The Bureau of Customs also explains that one QR code is used within the eTravel system for the applicable passenger process.
Save Your QR Code Immediately
Don’t close the page without saving your confirmation.
You can:
- Take a screenshot.
- Download the QR code.
- Save the confirmation email.
- Keep a paper copy as a backup if practical.
A saved copy can be useful if airport internet access is slow or your phone battery becomes an issue.
Understanding the eTravel QR Code
The QR code is an important part of the completed registration because it provides the digital confirmation associated with your submitted information.
The source material for this guide describes different QR outcomes, including green and red QR codes. The official eTravel FAQ explains that a Green QR Code indicates that the required information and attachments were complete and compliant under the rules applicable when that guidance was issued, while a red/registration QR outcome may indicate missing requirements requiring further assessment.
Because health and entry protocols can change, travellers should not rely on old quarantine-related explanations from earlier versions of the system. Instead, follow the instructions displayed by the current eTravel system and the relevant Philippine authorities.
What Happens After You Get the QR Code?
Your registration does not necessarily mean that every airport process is finished.
At the airport, you may still need to:
- Present your passport.
- Complete airline check-in and boarding requirements.
- Present or have your eTravel information verified.
- Proceed through immigration and/or customs as directed.
- Follow any additional instructions from authorised officers.
For customs processing, current Bureau of Customs guidance says passengers with nothing to declare are directed to the Green Lane, while passengers with something to declare or those selected for inspection use the Red Lane. The Green Lane QR scanning procedure was temporarily suspended, while Red Lane processing continues to require the applicable QR scanning and customs clearance process.
A Few Mistakes Can Cause Unnecessary Delays
Before travelling, remember these practical checks:
Don’t register too early
The system only permits registration within the applicable 72-hour window.
Don’t use a paid third-party website
Official eTravel registration is free.
Don’t enter passport information from memory
Use your actual passport while completing the form.
Don’t ignore customs questions
Currency and baggage declarations are part of the integrated eTravel Customs process.
Don’t forget the QR code
Save it before leaving home and keep your confirmation accessible during the journey.
Quick eTravel Philippines Checklist
Before going to the airport, make sure you have:
- Valid passport
- Confirmed flight or vessel details
- eTravel registration completed within 72 hours
- Correct personal information
- Correct travel details
- Customs declarations completed where applicable
- eTravel QR code saved
- Confirmation email available
- Mobile phone charged
- Backup copy of the QR code if practical
This small checklist can help prevent avoidable problems during your journey.
What If You Need to Update Your eTravel Record?
If your travel information changes or you discover an error, use the official eTravel portal and look for the available Update Existing Record/Edit Registration function.
The current eTravel system provides an Update Existing Record option using the reference number and date of birth.
If you make a change, check the resulting information again and save the latest QR code or confirmation rather than relying on an older version.
How to Check Your eTravel Philippines Registration
If you have already submitted an eTravel Philippines registration, keep your reference information available. The official eTravel system provides an option to update an existing record, using details such as the reference number and date of birth.
This is particularly useful when you notice a mistake after submitting your information.
For example, you may discover that:
- Your flight number was entered incorrectly.
- Your travel date has changed.
- Your accommodation information needs updating.
- A personal detail was entered incorrectly.
- You need to review the information associated with your registration.
Rather than creating unnecessary duplicate registrations, check the official portal for the option to retrieve or update your existing record.
Official portal: eTravel Philippines
A Useful Rule
Before changing anything, compare the information against your passport and current booking confirmation. Your eTravel Philippines information should reflect your actual journey.
What to Do If Your Flight Details Change
Travel plans sometimes change after an eTravel Philippines registration has already been completed.
If your airline, flight number or travel date changes, don’t simply assume that the previous QR code is still appropriate. Return to the official eTravel Philippines website and check whether your existing record can be updated.
After making an approved change:
- Review the updated information.
- Confirm that the new travel details are correct.
- Submit the changes if required.
- Generate or retrieve the updated registration confirmation.
- Save the latest QR code.
Keep the most recent version of your registration available when travelling.
Travel tip: Avoid relying on an old screenshot if your itinerary has changed. Save the updated confirmation after making any modification.
eTravel Philippines and Customs Declaration
One of the most important parts of the eTravel Philippines system is its connection with customs declarations.
The Bureau of Customs has integrated its Electronic Customs Baggage Declaration and Currency Declaration into the eTravel platform. This allows passengers to submit relevant customs information electronically instead of treating the declaration as an entirely separate process.
This means you should read the customs questions carefully before submitting your travel declaration.
What May Need to Be Declared?
Depending on your circumstances, customs questions can involve:
- Currency
- Goods purchased overseas
- Commercial quantities
- Agricultural products
- Restricted or regulated items
- Other articles subject to customs rules
The correct answer depends on what you are actually carrying.
Never select an answer simply because it appears to be the fastest way to finish the eTravel Philippines form.
Currency Rules Travellers Should Know
Currency declarations deserve particular attention.
The Bureau of Customs states that foreign currency exceeding US$10,000 or its equivalent must be declared. Philippine currency exceeding ₱50,000 is subject to prior written authorisation from the Bangko Sentral ng Pilipinas and must also be properly declared.
If you are carrying a significant amount of cash, check the current rules before travelling.
Why This Matters
A traveller may think that eTravel Philippines is only an immigration form, but the integrated system also handles information relevant to customs processing.
So don’t rush through the declaration section.
What Happens at Philippine Customs?
After arriving in the Philippines, passengers may be directed through different customs channels depending on whether they have goods to declare and whether customs inspection is required.
The Bureau of Customs explains that passengers with nothing to declare are directed to the Green Lane, while passengers with something to declare or passengers selected for inspection use the Red Lane.
Your eTravel Philippines registration therefore forms part of a wider border-processing procedure.
Green Lane
The Green Lane is intended for passengers who have nothing to declare under the applicable customs rules.
Red Lane
The Red Lane is used when a passenger has something to declare or is selected for customs inspection.
If you’re unsure whether an item needs to be declared, consult the current Bureau of Customs rules rather than guessing.
Common eTravel Philippines Problems and Their Solutions
Even though the registration is designed to be completed online, travellers can encounter technical or information-related problems.
Here are some of the most common situations.
1. OTP Verification Code Is Not Arriving
If the verification code doesn’t appear in your inbox, don’t immediately create another account.
Try these checks:
- Confirm that your email address is correct.
- Look in your Spam or Junk folder.
- Check whether your mailbox has enough storage.
- Wait a short period before requesting another code.
- Use the resend option when available.
- Try again with a stable internet connection.
If the email address was entered incorrectly, the OTP may naturally be sent somewhere else.
2. The System Does Not Accept Your Travel Date
One possible reason is that you are trying to register outside the permitted travel window.
The eTravel Philippines registration is intended to be completed within 72 hours before the relevant arrival or departure.
For example, attempting to complete the registration several days before the permitted period may result in a date-related problem.
What to Do
Check your actual flight date and calculate the applicable 72-hour period. Then return to the official portal when registration is available.
3. You Entered the Wrong Passport Information
Passport details deserve extra attention because they identify the traveller.
If you notice an error, don’t ignore it simply because the rest of the form is correct.
Use the official system’s available record-update function and check whether the submitted information can be corrected.
After updating it, save the current registration confirmation.
4. Your Flight Information Has Changed
If your airline changes your flight or you personally modify your booking, review your eTravel Philippines record.
A changed:
- Flight number
- Travel date
- Airline
- Port
- Other journey detail
may require your existing registration to be updated.
Use the official portal rather than a third-party website claiming it can modify your registration for a fee.
Is eTravel Philippines Really Free?
Yes.
The official eTravel website states that registration is free of charge.
This is one of the most important things to remember when searching for eTravel Philippines online.
Some websites may use names, colours or designs that make them appear connected with the Philippine government. A website asking you to pay simply to complete the official eTravel registration should therefore be treated with caution.
Never Pay for the Basic Registration
You do not need to pay a third-party company to submit the normal eTravel Philippines registration.
Use the government portal:
Official eTravel Philippines Website
Be especially careful with websites that ask for:
- Credit-card details
- Online payment
- Processing fees
- “Express” registration fees
- Unnecessary agency charges
eTravel Philippines Website vs Third-Party Websites
A simple way to avoid confusion is to use the official domain directly.
| Check | Official eTravel | Suspicious third-party site |
|---|---|---|
| Domain | etravel.gov.ph | Different domain |
| Basic registration | Free | May request payment |
| Government portal | Yes | No |
| Payment required for registration | No | May be requested |
| Source of instructions | Philippine government | Private operator |
The safest habit is to type etravel.gov.ph directly into your browser rather than relying on unfamiliar search results.
Can You Use Your Phone for eTravel Philippines?
Yes. The official eTravel platform is designed to work through a browser and can be accessed from mobile devices. The official FAQ describes the platform as mobile-responsive.
A smartphone can therefore be enough to:
- Open the official portal.
- Create or access your account.
- Enter travel information.
- Complete applicable declarations.
- Submit the registration.
- Retrieve the QR code.
However, completing the registration on a larger screen may be more comfortable if you have many details to enter.
eGovPH and eTravel Philippines
The Philippine government has also made eTravel available through the eGovPH mobile application.
This can be useful for travellers who already use the government application and want to access supported government services from one place.
However, don’t download an unofficial application simply because it contains the words “eTravel” or “Philippines”.
Use official government sources when checking which application or service is legitimate.
How to Keep Your eTravel QR Code Safe
Your QR code should be treated as an important travel document.
Once it becomes available, save it in more than one practical location.
Recommended approach
Primary copy:
Save the QR code or confirmation on your phone.
Backup copy:
Take a screenshot.
Additional backup:
If practical, keep a printed copy with your travel documents.
This matters because phones can run out of battery, become damaged or lose internet connectivity.
You don’t want to discover at the airport that your only copy is inaccessible.
What If Your Phone Has No Internet at the Airport?
Ideally, your eTravel Philippines QR code should already be saved before leaving for the airport.
Don’t depend entirely on airport Wi-Fi to retrieve your registration.
Before travelling, check that:
- The screenshot opens properly.
- The QR code is readable.
- Your phone has enough battery.
- Your confirmation is saved somewhere accessible.
- You know where the file or screenshot is located.
A paper backup can also be useful for travellers who prefer carrying printed travel documents.
eTravel Philippines for Families and Groups
Travelling with family members requires extra attention because each traveller may have different personal and passport information.
Don’t assume that entering one passenger’s details automatically covers everyone travelling with them.
Before the journey, verify the applicable registration requirements for each member of your group and make sure the information associated with each traveller is accurate.
For children and other dependants, use the options and instructions displayed by the current official system.
Important Safety Advice for eTravel Registration
The biggest risk is often not the government portal itself but fraudulent websites pretending to provide the service.
Keep these rules in mind:
1. Use the correct domain
The official portal is:
etravel.gov.ph
2. Don’t pay for registration
Official eTravel registration is free.
3. Don’t give your card details to an unofficial registration site
A payment request should immediately make you stop and verify the website.
4. Check your information before submitting
Passport and travel information should correspond with your real documents.
5. Save the QR code
Don’t wait until you’re already standing at the airport.
Quick Troubleshooting Table
| Problem | What to check |
|---|---|
| OTP missing | Spam folder, email spelling and resend option |
| Date rejected | Confirm that you are within the 72-hour registration window |
| Wrong passport details | Check the existing-record/update function |
| Flight changed | Review and update your registration |
| Payment requested | Leave the site and return to the official portal |
| QR code unavailable | Retrieve your existing record through the official system |
| Poor internet | Save a screenshot or printed backup before travelling |
| Unsure about customs | Check current Bureau of Customs requirements |
Final Pre-Flight eTravel Philippines Check
Before leaving for the airport, take two minutes to verify everything.
Personal details
☐ Name matches passport
☐ Date of birth is correct
☐ Nationality is correct
☐ Passport number is correct
Journey details
☐ Airline is correct
☐ Flight/voyage number is correct
☐ Travel date is correct
☐ Port information is correct
Registration
☐ Registration was completed within the permitted period
☐ Required declarations were answered
☐ QR code has been generated
☐ QR code is saved
Security
☐ You used etravel.gov.ph
☐ You did not pay a third-party registration fee
☐ You avoided suspicious websites and applications
This final check can catch small errors before they become airport problems.
What Happens After Completing eTravel Philippines?
After you successfully submit your travel information, the system provides your eTravel registration confirmation and QR code where applicable.
Save this information before travelling. Your eTravel Philippines registration is intended to support the processing of your journey, but it does not replace your passport, airline ticket or other documents that may be required for travel.
At the airport, follow the instructions given by airline staff and Philippine government officers.
Keep These Documents Together
Before leaving for the airport, it is sensible to have access to:
- Valid passport
- Airline or vessel booking
- eTravel Philippines QR code
- Other documents required for your particular journey
- Customs-related documents, where applicable
- Visa or immigration documents, if applicable
The exact documents required can vary depending on nationality, destination, immigration status and travel circumstances.
eTravel Philippines for Arriving Travellers
If you’re entering the Philippines, complete your eTravel Philippines registration within the applicable registration period before your arrival.
The registration process collects information that can be used for border, health and customs-related processing.
After submitting the form, make sure your QR code or confirmation is accessible.
When you arrive, follow the airport signs and instructions from authorised personnel. The QR code does not mean that you can skip every other immigration or customs requirement.
Your passport remains essential.
eTravel Philippines for Departing Filipino Travellers
For Filipino citizens leaving the Philippines, the eTravel system also provides the applicable departure registration process.
Before travelling, check that your:
- Passport details are correct.
- Flight details match your booking.
- Travel date is accurate.
- Required declaration information has been completed.
- QR confirmation is available.
Foreign tourists departing the Philippines should check the current official eTravel instructions because the departure registration requirement differs from that applicable to departing Filipino citizens.
Does eTravel Philippines Replace a Visa?
No.
An eTravel Philippines registration should not be confused with a visa or immigration permission.
A traveller who requires a visa must still comply with the applicable visa requirements. Completing an eTravel registration does not automatically provide permission to enter the Philippines.
Likewise, eTravel Philippines does not replace your passport.
Think of the services separately:
Passport → identifies you
Visa → provides immigration permission where required
eTravel registration → submits the required electronic travel information
Airline ticket → confirms your booked journey
Keeping these requirements separate makes the process easier to understand.
Does eTravel Philippines Guarantee Entry?
No.
Completing the registration does not by itself guarantee admission to the Philippines.
Immigration authorities may still assess a traveller’s documents and circumstances according to Philippine immigration rules.
Similarly, customs authorities retain responsibility for customs inspection and declarations.
For that reason, travellers should treat eTravel Philippines as an important pre-travel registration requirement, not as a substitute for immigration or customs clearance.
How to Avoid Fake eTravel Philippines Websites
Search engines can display many pages discussing eTravel Philippines. Not every result is an official government service.
The safest approach is to start directly from:
Official eTravel Philippines Portal
Check the website address
The official website uses:
etravel.gov.ph
Be careful if a website:
- Uses a different domain.
- Claims to be an “official agent”.
- Requests a registration fee.
- Requests unnecessary payment-card details.
- Promises guaranteed immigration approval.
- Claims to provide a special paid QR code.
Official eTravel registration is free.
eTravel Philippines: Frequently Overlooked Details
Several small details are easy to overlook when completing an online travel form.
Check the spelling of your name
Use your passport as the reference rather than a nickname or shortened version.
Check numbers carefully
Passport and flight numbers often contain combinations of letters and numbers that are easy to mistype.
Review your travel date
The registration window is limited, so the date must correspond with your actual journey.
Check your customs declaration
Don’t automatically select “No” without considering what you are carrying.
Save the final QR code
If you update your record later, save the latest confirmation rather than keeping only an older screenshot.
What You Should Never Do
When dealing with eTravel Philippines, avoid these mistakes:
Don’t pay a random website for registration.
The official service is free.
Don’t provide false information.
Travel declarations should accurately reflect your circumstances.
Don’t register outside the permitted window and assume it will work.
The system uses a defined registration period.
Don’t rely on an old QR code after changing your travel information.
Review the record and obtain the current confirmation.
Don’t wait until the airport to start the process.
Completing the registration before travelling gives you time to fix problems.
eTravel Philippines Quick Guide
If you only need the process in a few steps, use this checklist:
1. Visit the official website
Go directly to etravel.gov.ph.
2. Sign in or create your account
Use an active email address and complete verification.
3. Wait for the correct registration period
Complete the registration within the applicable 72-hour window.
4. Enter your traveller information
Use your passport as the primary reference.
5. Add your journey details
Enter the correct airline, flight/voyage information, date and applicable port.
6. Complete the declarations
Answer health and customs-related questions accurately.
7. Review everything
Check every important number and spelling before submitting.
8. Submit
Complete the registration through the official portal.
9. Save the QR code
Take a screenshot or download your confirmation.
10. Bring your travel documents
Keep your passport, booking and eTravel confirmation accessible.
Final eTravel Philippines Travel Checklist
Use this immediately before travelling:
| Check | Status |
|---|---|
| Official website used | ☐ |
| Registration completed within 72 hours | ☐ |
| Passport information checked | ☐ |
| Name checked against passport | ☐ |
| Flight/vessel information checked | ☐ |
| Customs declaration completed where applicable | ☐ |
| QR code saved | ☐ |
| Backup screenshot created | ☐ |
| Phone charged | ☐ |
| Passport packed | ☐ |
| Booking confirmation available | ☐ |
| Visa/other immigration documents checked | ☐ |
FAQs About eTravel Philippines
Conclusion
Completing your eTravel Philippines registration before travelling can help make your journey smoother and avoid unnecessary delays at the airport or seaport. The process is completed online through the official eTravel portal, and registration is free. Travellers should complete their details within the required 72-hour period before arrival or departure, using accurate passport, travel, accommodation, health and customs information.
Always check your information carefully before submitting the form and keep your eTravel QR code readily available on your phone. Saving a screenshot or printed copy can also provide a useful backup during your journey.
Most importantly, use only the official eTravel Philippines website and be cautious of websites or individuals asking for payment for registration. By following the correct steps and keeping your travel information accurate, you can complete your eTravel registration with greater confidence and be better prepared for your trip.
Read more
PSA CRS Appointment System: Complete Online Booking Guide
PNP FEO Online System: Complete Registration, License and Application Guide
BIR ORUS Online Registration and Update System: Complete Guide
Complete Guide to Senator Bong Go Assistance, eGovPH, and Online Applications
SALN Form 2026: Complete Download and Step-by-Step User Guide
MySSS Card 2026: Requirements, Online Application, Fees & Complete Guide
SALN Form 2026: Complete Download and Step-by-Step User Guide
x
BIR eFPS 2026: Registration, Login, Tax Filing and Payment GuideMATATAG Curriculum Guide 2026
MAAG Curriculum Guide 2026